 Server
Colocation
 CDN
Network
 Linux Cloud
Hosting
 VMware Public
Cloud
 Multi-Cloud
Hosting
 Cloud
Server Hosting
 Kubernetes
 API Gateway

Web Host Manager (WHM) provides a comprehensive suite of tools for web hosting administrators. Using a backup user selection interface is a crucial task for managing and safeguarding the data on your server.
This guide will walk you through how to use the backup user selection interface in WHM effectively.
The backup user selection interface in WHM allows server administrators to choose which users’ accounts to include in the backup process. It ensures that critical websites and data are protected, while unnecessary accounts can be excluded to save storage space and resources.
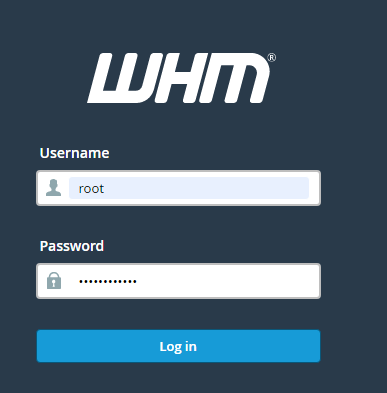
Log in to your WHM interface by
Navigating to http://yourserverip:2087 in your web browser
Entering your root or administrative credentials.

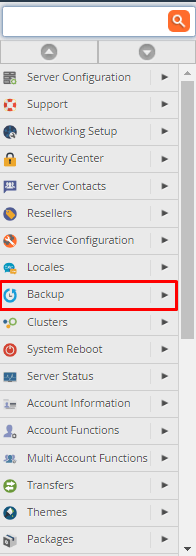
Once logged in, locate the "Backup" section in the WHM dashboard.
Click on "Backup Configuration" to access the settings for managing backups.

Ensure that backups are enabled.
In the "Global Settings" section, toggle the "Enable Backups" switch to on. This will activate the backup functionalities in WHM.

In the "Backup Type" section, choose the type you want to perform:
Compressed: Backups are compressed to save space but take longer to complete.
Uncompressed: Backups are faster but use more storage.
Incremental: Only the changes made since the last backup are saved, reducing backup time and storage requirements.
Set the backup schedule under the "Scheduling and Retention" section.
You can specify daily, weekly, or monthly backups. It’s advisable to balance frequency with storage capacity and recovery needs.
Scroll to the "Files" section and find the "Backup User Selection" interface.
Here, you can select which user accounts to include in the backup.
In the "Backup User Selection" interface, you will see a list of all user accounts on the server. There are multiple ways to select users:
Individual Selection: Check the box next to each user account you want to include in the backup.
Select All: Back up all accounts using the "Select All" option.
Deselect All: Use this to reset your selections and start over.
WHM allows you to use filters to streamline the selection process:
Package-Based Selection: Select users based on the hosting package they are assigned to.
Reseller-Based Selection: If you have reseller accounts, you can include or exclude all accounts under a specific reseller.
For more granular control, you can customize backup settings for each user:
Exclude Specific Files or Directories: Specify particular files or directories within each user account to exclude from the backup.
Include/Exclude Databases: Decide whether to include or exclude databases for each user.
After making your selections, review them carefully to ensure all necessary accounts are included.
Click "Save Configuration" to apply your settings.
Advanced Tips for Effective Backup Management in WHM
1. Regularly Update Backup Selections
Review User Selections: Periodically review and update the list of users included in your backup selections. This ensures that any new users or changes in data importance are accounted for, keeping your backups relevant and comprehensive.
Automate Updates: If possible, automate the process of updating backup selections to ensure no critical data is missed.
2. Test Your Backups
Restore to a Test Environment: Regularly restore backups to a test environment to verify their integrity and ensure that data can be restored effectively. This practice helps identify potential issues before a real recovery situation arises.
Document Test Procedures: Maintain detailed documentation of your backup testing procedures and results to track consistency and identify areas for improvement.
3. Use Multiple Backup Destinations
Enhance Redundancy: Utilize multiple backup destinations to enhance redundancy. WHM supports local storage, remote FTP/SFTP servers, and cloud storage solutions. Distributing backups across different locations protects against local hardware failures.
Schedule Backups Appropriately: Schedule backups to different destinations at different times to minimize the risk of simultaneous failures.
4. Monitor Backup Storage
Track Storage Usage: Regularly monitor your backup storage usage with WHM's built-in tools. Keeping an eye on storage helps prevent running out of space, which could cause backups to fail.
Optimize Storage Utilization: Consider implementing strategies to optimize storage utilization, such as deduplication and compression.
5. Secure Your Backups
Enable Encryption: Encrypt your backup files to protect sensitive data. WHM offers options for encrypting backups, adding an extra layer of security against unauthorized access.
Use Strong Passwords and Keys: Ensure that encryption keys and passwords are strong and stored securely. Regularly update encryption keys to enhance security.
Restrict Access: Limit access to backup files to only those who need it. Use WHM's permission settings to control access to backup data.
6. How to Backup WHM
Configure Backup in WHM:
Navigate to WHM > Backup > Backup Configuration.
Enable the backup system by toggling the switch to Enabled.
Select your backup type (Compressed, Uncompressed, or Incremental).
Configure your backup schedule, including the days and time for the backup process.
Choose the backup retention period, determining how long backups should be kept.
Specify backup destinations (local, remote FTP/SFTP, cloud storage).
Set up additional options, such as database backups and account configurations.
Save your configuration.
Run Manual Backups: To manually run a backup, navigate to WHM > Backup > Backup Now. This allows you to create an immediate backup based on your configured settings.
7. Query Backup Feature in WHM
Access Query Backup Feature:
In WHM, navigate to Backup > Backup Restoration.
Use the available filters to search for specific backups based on criteria such as date, user, or account.
This feature helps you quickly find and restore the necessary backup files without manually searching through directories.
Additional Tips
Regular Backup Schedules: Establish and adhere to a regular backup schedule to ensure consistent data protection.
Notification and Alerts: Set up notifications and alerts for backup completion, failures, and storage thresholds to stay informed about the backup status.
Disaster Recovery Plan: Develop and maintain a comprehensive disaster recovery plan that includes detailed backup and restoration procedures.
By implementing these advanced tips, you can enhance the reliability, security, and effectiveness of your backup management in WHM.
To effectively utilize the backup user selection interface in WHM, it is crucial to having a proper understanding of how it works with regards to the data of your server. Therefore, by selecting which user accounts to back up, the type and frequency of the backup, and routinely checking and updating the backup, the user will be able to develop a robust backup system. Additional features of WHM filters, multiple backup sites, and encryption add to the functionality and usability of your backup process and give you confidence and security.

Let’s talk about the future, and make it happen!
By continuing to use and navigate this website, you are agreeing to the use of cookies.
Find out more


