Server
Colocation
Server
Colocation
 CDN
Network
CDN
Network
 Linux Cloud
Hosting
VMware Public
Cloud
Multi-Cloud
Hosting
Cloud
Server Hosting
Linux Cloud
Hosting
VMware Public
Cloud
Multi-Cloud
Hosting
Cloud
Server Hosting
 Kubernetes
 API Gateway
Are you looking for a blog where you can learn how to create email accounts from cPanel? You are in the right corner. In today’s epoch of technology, email is the most important thing for professional & commercial communication.
This is where cPanel comes into play. It is a widely used web hosting control panel. In addition, creating email accounts on cPanel is straightforward.
In this knowledge base section, we will guide you how to create email accounts using cPanel in a few simple steps.
Let’s get started!
To create an email account using cPanel, first log in to your account. Your hosting provider will supply you with cPanel login credentials.
Log in to cPanel using username and password. After successful authentication, you will be welcomed by the cPanel dashboard.
Once you're logged in, it's time to find the Email section within cPanel. For instance, we have shared images for the same.
Click on this section to explore its various features, including Email Accounts, Forwarders, Autoresponders, and more.
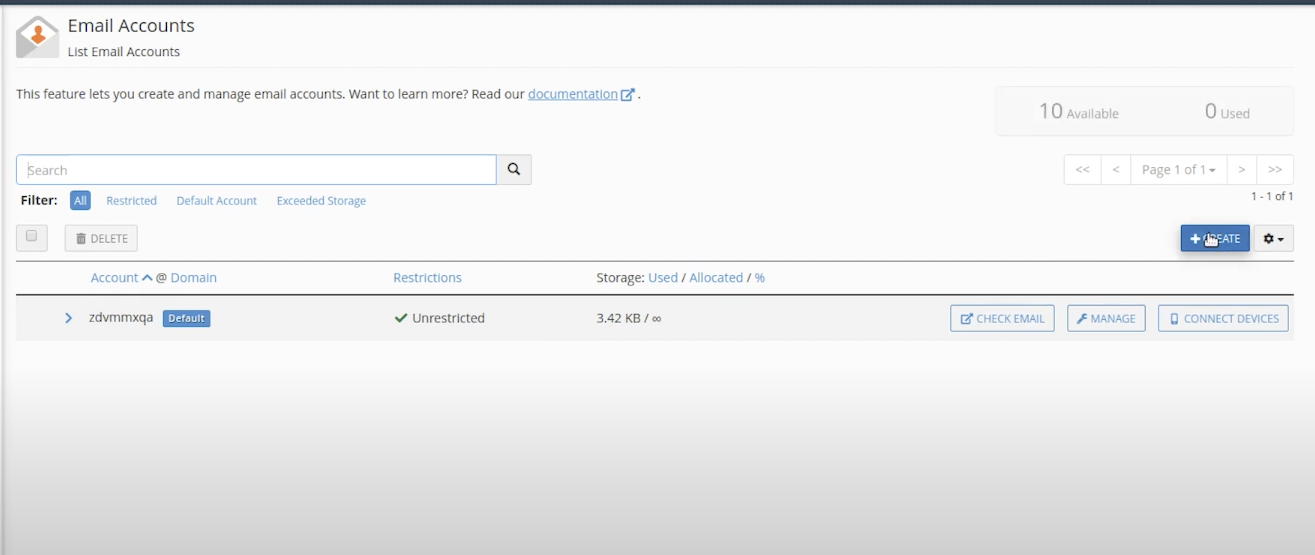
Among the array of options in the Email section, locate and click on "Email Accounts." This action will direct you to a page dedicated to managing email accounts associated with your domain.
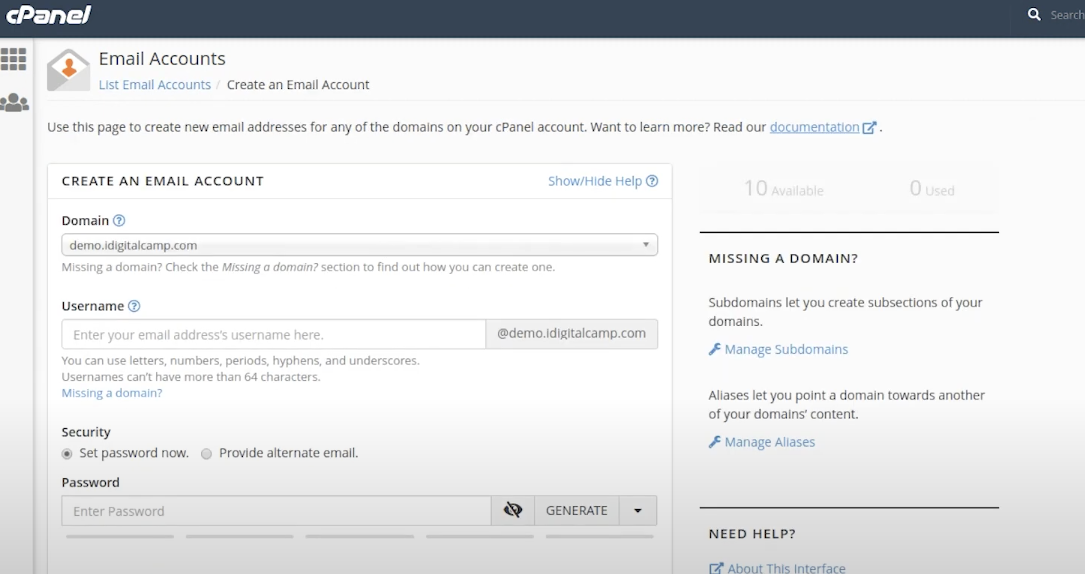
Now that you're in the Email Accounts section. It's time to add a new email account. Follow these steps:
Now that you have submitted all of the essential information. It's time to establish your email account.
Click on the "Create Account" button. You begin the process of setting up your new email address. cPanel quickly processes your request. In addition, your email account is set up and ready to use in minutes.
Upon successful creation of the email account, cPanel displays a confirmation message on the screen. This message contains pertinent details about the newly created email address, including the username and the complete email address itself. It serves as confirmation that your email account setup was successful.
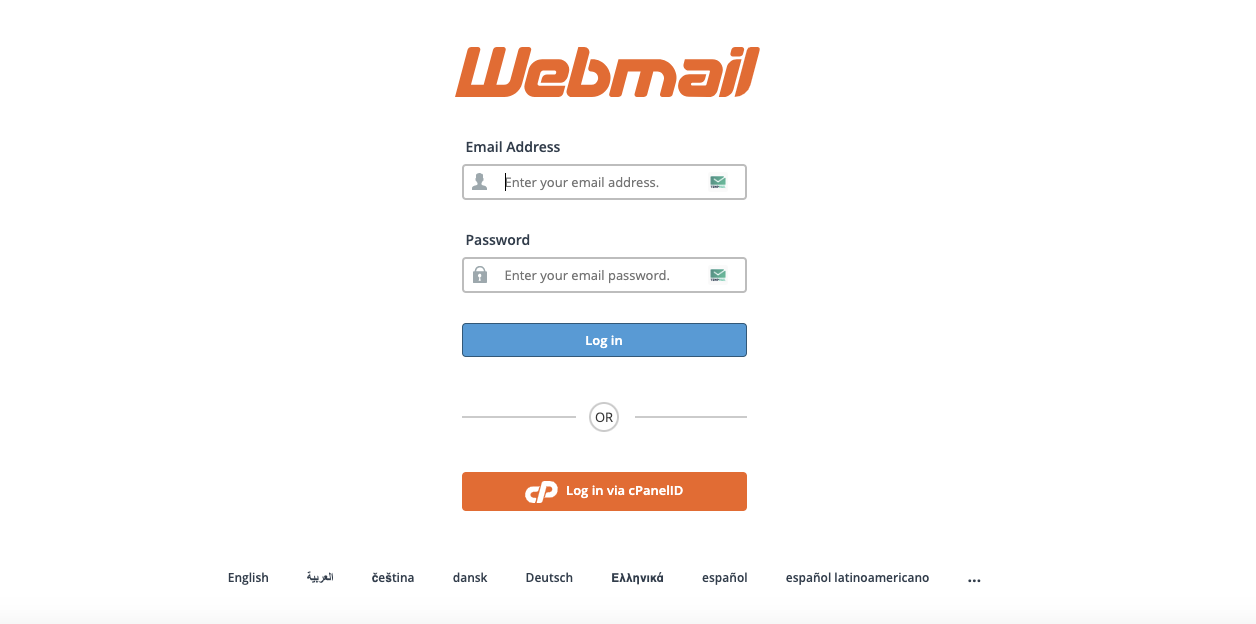
Now you can access your mail account by different means. cPanel has a webmail feature that allows you to access your emails through the browser.
Visit the webmail URL given by your hosting service. Ultimately, use your email address and password to log in.

Let’s talk about the future, and make it happen!

 Pricing
Calculator
Pricing
Calculator
 Power
Power
 Utilities
 VMware
Private Cloud
VMware
Private Cloud VMware on
AWS
VMware on
AWS VMware on
Azure
VMware on
Azure Service
Level Agreement
Service
Level Agreement