Server
Colocation
Server
Colocation
 CDN
Network
CDN
Network
 Linux Cloud
Hosting
VMware Public
Cloud
Multi-Cloud
Hosting
Cloud
Server Hosting
Linux Cloud
Hosting
VMware Public
Cloud
Multi-Cloud
Hosting
Cloud
Server Hosting
 Kubernetes
 API Gateway
If you run a web API or a mobile application, you can follow a situation in which you must redefine which database operations can be conducted by whom. This could be the case if you’re augmenting the numbers with new team members, changing the role of current ones, or securing your environments. The DirectAdmin(a popular web host control panel) will simplify altering user privileges on a database.
This knowledge base will provide you with guidelines and also ensure that you can easily understand how to carry out the action.
Let’s get started!
The first key step is to understand basic notions regarding database user privileges. "Privileges" simply are the rights of access to a database, which facilitates the users to authorize and evolve database content. In other words here, one could do some things like view the data while others are allowed to add or remove some data.
To begin, you must log into your DirectAdmin account. Usually, you can accomplish this by entering http://yourdomain.com: 2222 in the address bar of your browser. Change "yourdomain.com" to the name of your genuine domain. Enter your password and username as soon as the login screen loads.
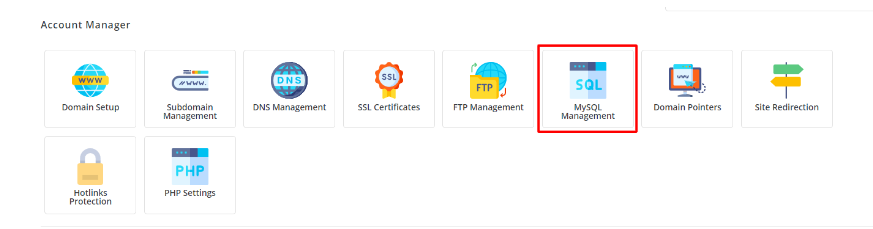
After logging in, you'll see the DirectAdmin dashboard. Look for the section labeled "Account Manager," where you usually manage database-related settings. Click on “MySQL Management” or a similarly titled link; this is where all database configurations are handled.
On the MySQL Management page, you'll see a list of databases. Each database has associated users and their privileges. Find the database for which you want to modify user privileges and click on it.
You'll get a list of users with access to the database after choosing it. Next, a link or button with the title "Modify Privileges" or "Edit Privileges" needs to be available for each user. To modify the privileges of a user, click this link or button.
.This will open a new page displaying privileges such as SELECT, INSERT, UPDATE, DELETE, and more. These represent different actions a user can perform:
SELECT: Allows reading data from the database.
INSERT: Allows new records to be added to the database.
UPDATE: Allows modifying existing records.
DELETE: Allows removing records from the database.
Simply tick or uncheck the boxes next to each permission to modify the user's rights based on what you wish to allow or prohibit. It's critical to carefully consider what level of access each user needs to carry out their duties without jeopardizing the security or accuracy of your data.
Once you’ve adjusted the privileges as needed, look for a button or link labeled “Save Changes” or “Update Privileges.” Click it to save the settings. DirectAdmin will usually confirm that the changes have been made successfully.
After modifying the privileges, it’s a good practice to log in as the user (if possible) to ensure they have the access they need and no more. This helps prevent accidental data loss or security issues.
Ensuring that only appropriate people have access to the database information on your website or application is a significant part of safely securing and working effectively with the database. If you are a DirectAdmin, then not only does the process work, but it is also smooth and speedy, letting you easily tweak what you want without back pain. Remember always to keep philosophical quotes in mind—give users authority only for the minimum action needed for their role.
This knowledge base should lead you with no doubt so that you can confidently manage user privileges in your encrypted database. You can feel relaxed knowing that your system is working correctly and securely. When upgrading the system, remember to re-check and update the settings. It will decrease the number of common bugs. For more information-contact our cloud experts today!

Let’s talk about the future, and make it happen!

 Pricing
Calculator
Pricing
Calculator
 Power
Power
 Utilities
 VMware
Private Cloud
VMware
Private Cloud VMware on
AWS
VMware on
AWS VMware on
Azure
VMware on
Azure Service
Level Agreement
Service
Level Agreement