 Server
Colocation
Server
Colocation
 CDN
Network
CDN
Network
 Linux Cloud
Hosting
VMware Public
Cloud
Multi-Cloud
Hosting
Cloud
Server Hosting
Linux Cloud
Hosting
VMware Public
Cloud
Multi-Cloud
Hosting
Cloud
Server Hosting
 Kubernetes
 API Gateway
.jpg)
The CWP, or Control Web Panel, is a powerful and user-friendly web server control panel that allows you to manage different aspects of your web server simply. It represents a huge collection of features, the most important of which are accounts management, domain management, email management, database management, etc.
In this guide, we will explain the steps for installing CWP on your local system.
Decide which machine you need to set up the holders on. Make sure that it meets these specifications.
A compatible operating system(CentOS 7 or later version, Ubuntu 1804 or later version, Debian 9 or later version).
At a minimum of 1GB of memory and 20GB of disk space.
IP address of your server or a dome name pointing to your IP address.
Administrators with the privilege of using sudo or root right
In order to make your setup secure and ready for any challenge, you should always have the latest software packages and security patch upgrades. Open the terminal and execute the commands given for either the MacOS or Windows operating system.
Step 2: Install Required Dependencies
The CWP, an abbreviation for the Convolution Wavelet-Based Pattern Classification algorithm, depends somewhat on the software installed on the computer. Use the given code lines to download the required packages.
Step 3: Download the CWP Installation Script
Managed cwp vps may greatly simplify this process since the shell provides an easy-to-use installation script. Use the script below, which has been created via the following command:
wget https://cpaneldcplugin.s3.amazonaws.com/install/install-latest
Step 4: Run the CWP Installation Script
Once the script is downloaded, do the executable part to make it executed; then run the following commands to run the script:
The section of the guide influencer that handles the installation will walk you through all the steps you need to follow. Rely on prompts and display guidance and input when necessary.
The last stage is the application of managed cwp vps and its customization to work precisely for you. Access the CWP interface by navigating to http: On your web browser, type the //your_server_ip:7080 or http://your_domain:7080 as the web address.
On the login page, fill in the default username (root) and enter the password you provided during installation. However, make sure you click on the "Remember me" option so that you don't have to log in or sign in every time.
You should add the following text immediately after the sentence in quotation marks. Once logged in, you will be able to modify different settings like the server configuration, account management, email settings, and so on.
To take into account the safety of your managed cwp vps set, please kindly look at these instructions:
Change Default Ports: By changing the ordinary port of the higher protocols HTTP (80) and HTTPS (443) to a non-standard port, you will minimize the probability of falling victim to malware.
Enable Two-Factor Authentication (2FA): For additional security, enable 2FA among the protected identities they intend to access on the CWP interface.
Update Regularly: Always ensure that both the CWP and the web apps are updated with the latest security patches and files.
Configure Firewall: Set up a firewall so it will only accommodate the required ports and close them off from unverified sources.
CWP has diverse setups and integrations to bring efficiency to the hosting operations, which is the set of internet-connected devices that provide services. Some notable features include:
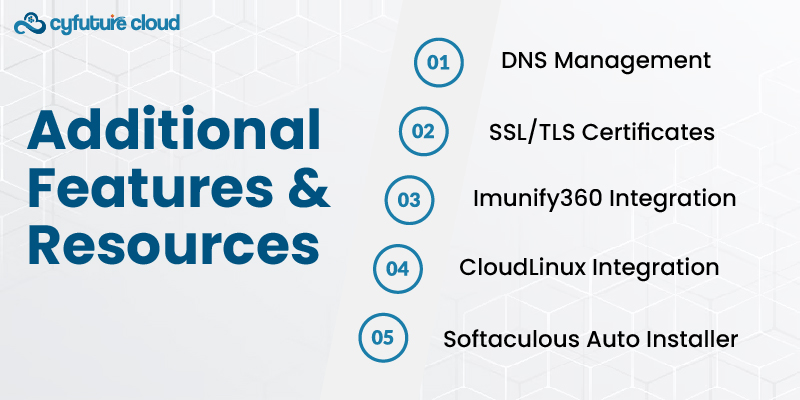
Softaculous Auto Installer: Use the quick-click function to set up and monitor a range of web applications, such as WordPress, Joomla, and Drupal.
CloudLinux Integration: Use CloudLinux, a cloud-based technology that helps increase server uptime and performance.
Imunify360 Integration: Imunify360 protective measures will help you safeguard your server from malware, exploits, and other identical security hazards.
DNS Management: Manage your CWP DNS records from the interface itself.
SSL/TLS Certificates: Include and handle certificate generation and management for secure connections as SSL/TLS.
For more details, feel free to visit the official CWP website and explore discussions on community support groups:
CWP Documentation: https://docs.cpanel.net/cwp/
CWP Community Forums: https://forums.cpanel.net/categories/cwp.6/
With adherence to this, you must install and configure the Control Web Panel (CWP) on your server, which will enable you to run your website/web hosting environment effectively and securely.

Let’s talk about the future, and make it happen!

 Pricing
Calculator
Pricing
Calculator
 Power
Power
 Utilities
 VMware
Private Cloud
VMware
Private Cloud VMware on
AWS
VMware on
AWS VMware on
Azure
VMware on
Azure Service
Level Agreement
Service
Level Agreement 