Server
Colocation
Server
Colocation
 CDN
Network
CDN
Network
 Linux Cloud
Hosting
VMware Public
Cloud
Multi-Cloud
Hosting
Cloud
Server Hosting
Linux Cloud
Hosting
VMware Public
Cloud
Multi-Cloud
Hosting
Cloud
Server Hosting
 Kubernetes
 API Gateway
FTP (File Transfer Protocol) Access is, in fact, the building block of managing a web hosting account. Through this method, users can add, delete, or oversee their files on their server remotely. Enabling FTP access will be easy using WHM (Web Host Manager), the control panel for server administration for hosting environments that run cPanel software. Although it may be half the challenge, it is essential for efficient web file management for site owners and developers.
In this knowledge base our main aim will be to lead you through the processes you need to enable FTP access in WHM so that you can do it whenever you want or need to do it. Be it you are a seasoned web hosting professional or a newbie in server administration, grasping the gist of how to allow FTP access in WHM is likewise of great importance because it aids in the smoother functioning of the server operations and ensures that clientele have the necessary tools to handle their web content robustly.
Let’s dive in!
Step 1. Log in to the WHM account.
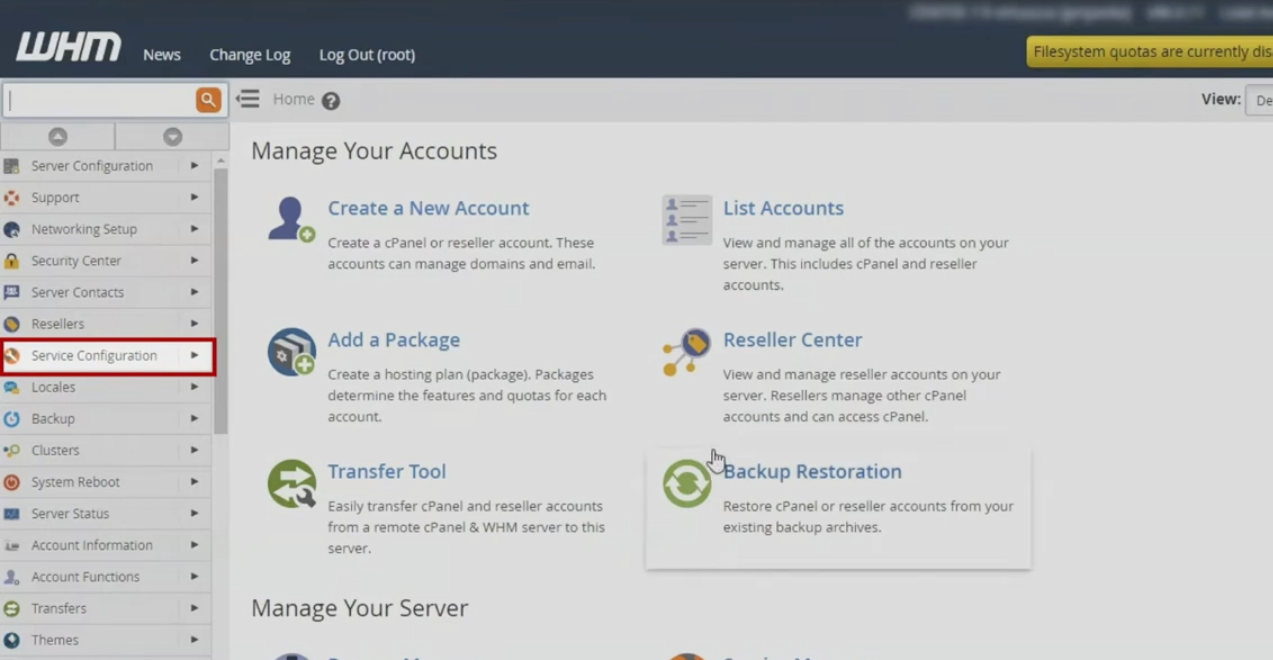
Step 2. Click on the Service Configuration option.
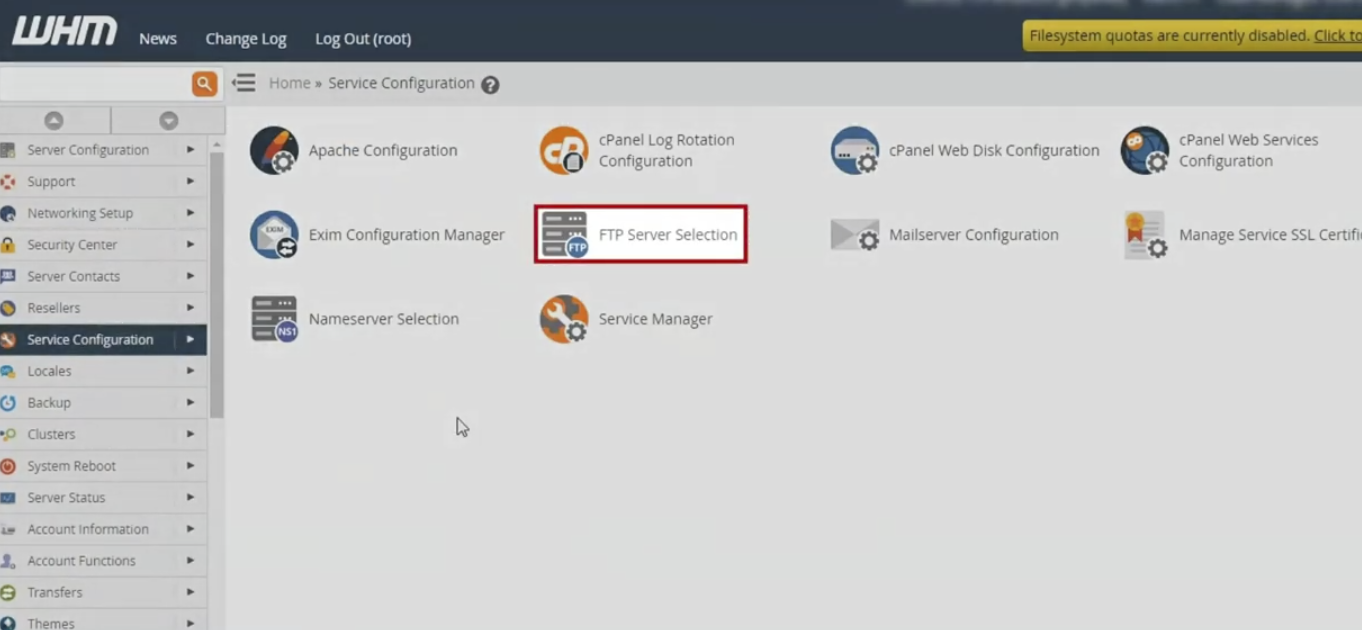
Step 3. Click on the FTP Server Selection icon
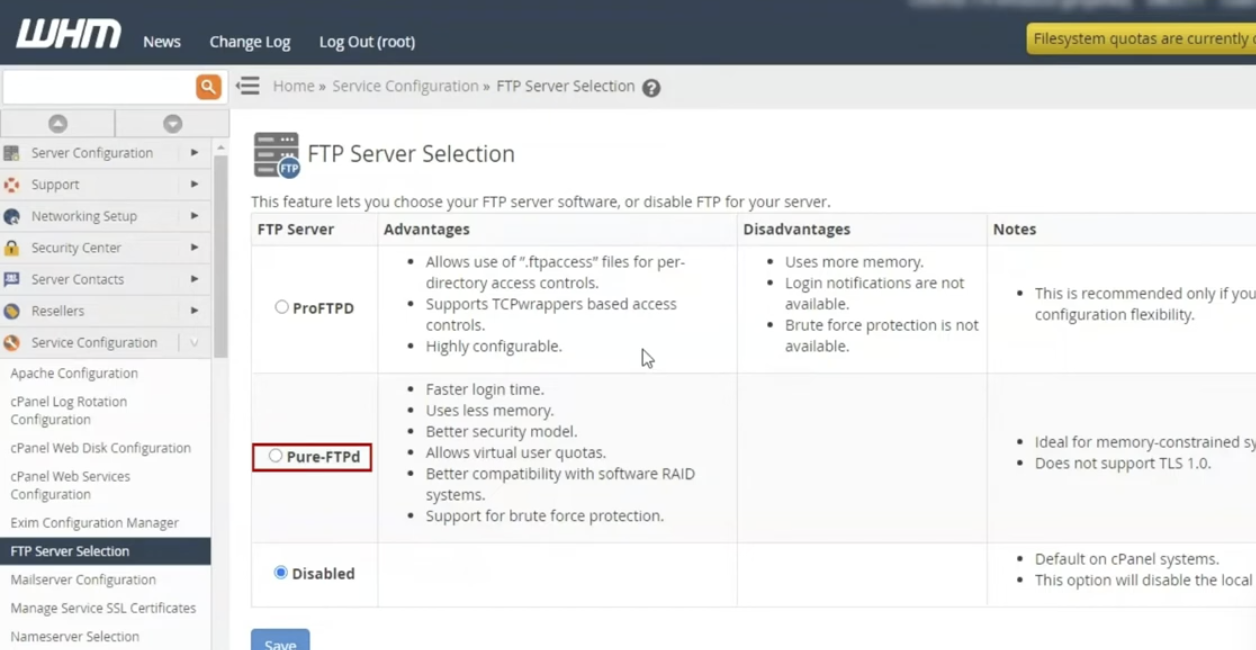
Step 4. To enable FTP accounts, choose between Pro-FTPD or Pure-FTPD. Then, click the Save button to activate.
WHM will start the FTP server installation procedure. The installation and conversion of the FTP servers will take some time to finish, at which point a success message will show up.
Next, the FTP account's server settings must be changed. By clicking the FTP Server Configuration link, as shown in the picture, you can access the configuration interface immediately.
If you decide to do it later, you will need to log into your WHM account to use the configuration tool.
Edit FTP server configuration is a central job for server managers. It permits them to adjust settings such that they are in accordance with varying needs or security measures. Below is a step-by-step guide on how to edit the FTP server configuration:Below is a step-by-step guide on how to edit the FTP server configuration:
Step 1: Log in to the WHM account.
Step 2: Traverse over to 'FTP Server Configuration' – In WHM, search and click on 'FTP Server Configuration' under the 'Service Configuration' section.
Step 3: Choose FTP Server Either - Select the FTP server type that's more suitable for your needs. These assemblies are often given FTP access and configured with tools such as Pure-FTPd and ProFTPd.
Step 4: Configure the Basic Settings—Modify the basic settings, such as the maximum number of connections, maximum connections per IP address, and timeout setting, as needed.
Step 5: Tighten Security Settings—Under these conditions, implementing TLS encryption, IP address access control, and directory restrictions could increase the security of your FTP server.
Step 6: Save Changes
Step 7: Test FTP Connectivity—Connect to the server using an FTP client to verify that FTP connections are still functional after the configuration changes.
By following these steps, you can edit the FTP server configuration in WHM effectively, ensuring optimal performance and security for your server environment. For more information-contact Cyfuture Cloud experts.

Let’s talk about the future, and make it happen!

 Pricing
Calculator
Pricing
Calculator
 Power
Power
 Utilities
 VMware
Private Cloud
VMware
Private Cloud VMware on
AWS
VMware on
AWS VMware on
Azure
VMware on
Azure Service
Level Agreement
Service
Level Agreement