Server
Colocation
Server
Colocation
 CDN
Network
CDN
Network
 Linux Cloud
Hosting
VMware Public
Cloud
Multi-Cloud
Hosting
Cloud
Server Hosting
Linux Cloud
Hosting
VMware Public
Cloud
Multi-Cloud
Hosting
Cloud
Server Hosting
 Kubernetes
 API Gateway
Today, we will provide you with a step-by-step guide to editing an MX record in Webuzo.
Why is editing required?
MX records for a hosting account may need to be adjusted to accommodate new setups. The Webuzo panel allows users to update any MX record associated with their account.
Among these settings, the MX record is very important, especially when it comes to controlling email services linked with your domain.
Let’s get started!
An MX (Mail Exchange) record is a DNS component that specifies the appropriate mail server that sends and receives email messages on a domain's behalf.
It transfers the message to the appropriate email server whenever someone sends an email on your domain.
Hence in turn, this ensures that the aid was no longer subjected to further redistribution.
- Changing Email Service Providers
When you switch email service providers or relocate your email hosting to a different server or cloud platform. Then you must update your MX records accordingly.
- Custom Domain Setup
When creating custom email addresses with your domain. Then properly establish the MX record. It ensures that emails are sent to the appropriate mail server.
- Improving Email Deliverability
By modifying MX records, you may improve email delivery performance, strengthen security, and assure dependable communication channels.
Webuzo is a Multi-User Control Panel built for Hosting Providers, Resellers, and Website Owners. It simplifies server management tasks. Moreover, it offers a user-friendly interface for deploying and managing web applications.
With Webuzo, users can effortlessly navigate various server configurations. It includes DNS settings like MX records, without the need for extensive technical expertise.
Follow these steps to edit MX records using Webuzo:
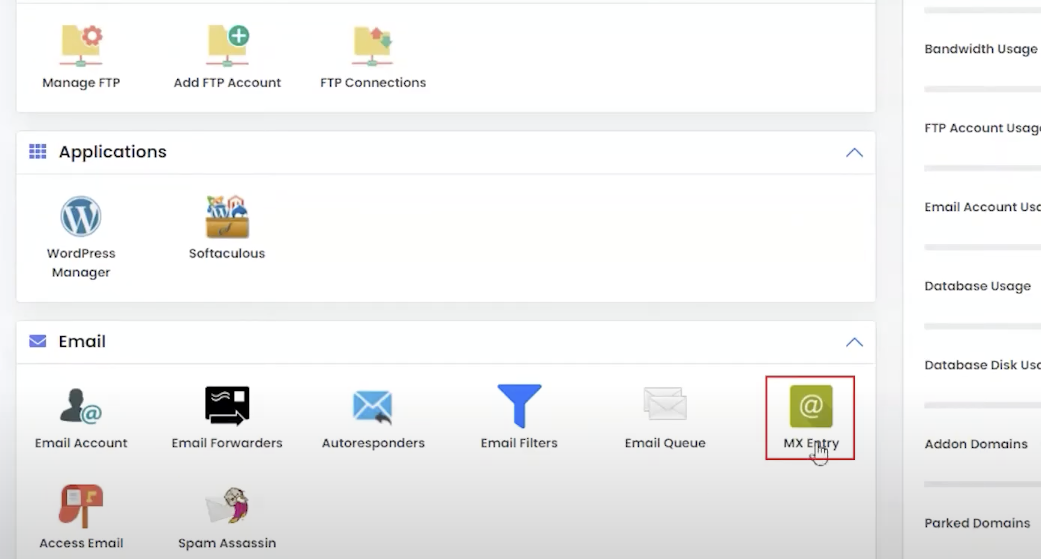
Log in to Webuzo: Access your Webuzo control panel by entering your credentials.
Navigate to DNS Settings: Locate the "DNS Zone Editor" or similar option within the control panel. This feature allows you to manage DNS records for your domains.
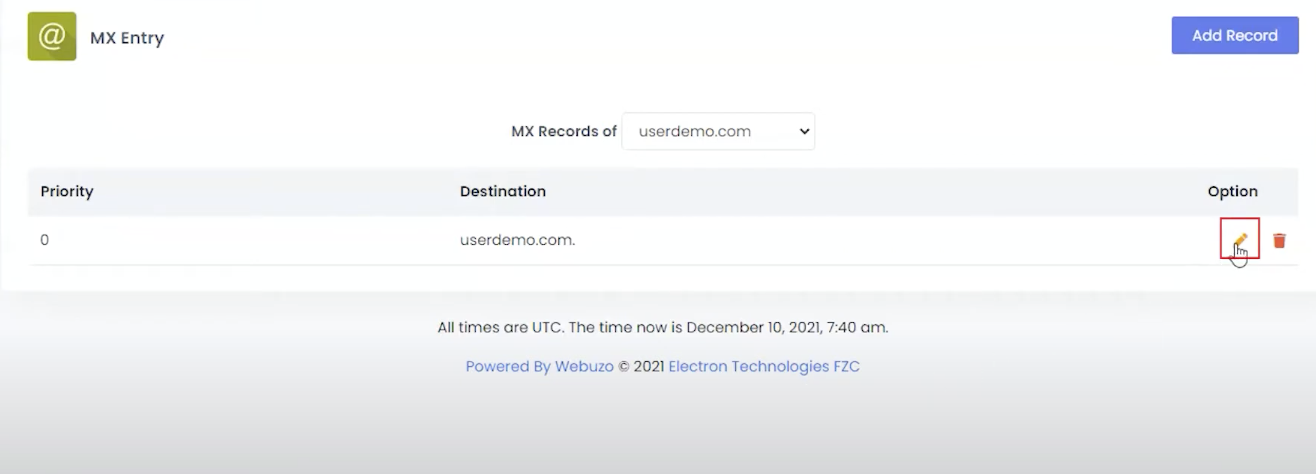
Select the Domain: Choose the domain for which you want to edit the MX record from the list.
Edit MX Record: You can add, modify, or delete MX records as needed.
Specify Mail Server: Enter the hostname of the mail server where you want to route emails. This could be a cloud-based email service provider or your own mail server.
Set Priority: Assign priority values to MX records if you have multiple mail servers. Lower values indicate higher priority, with emails being routed to servers with the lowest priority first.
Save Changes: Once you have made the necessary adjustments, save your changes.
MX records in Webuzo have editing features that many customers who wish to deal with their email administration efficiently can find useful. It doesn't matter whether you're changing a current email service or just trying to improve email delivery; if you know how to of MX records on your domain name, you will have more authority in your arena of domain email.
With Webuzo's user-friendly interface, configuring DNS settings becomes a breeze, allowing you to focus on what matters most: ensuring that reliable routes for your cloud applications and services are secure.
This knowledge base will show you how to use the methods given, and, you will be able to switch the MX records in Webuzo and choose the ideal options that relate to the mailing system, its load, and speed.

Let’s talk about the future, and make it happen!

 Pricing
Calculator
Pricing
Calculator
 Power
Power
 Utilities
 VMware
Private Cloud
VMware
Private Cloud VMware on
AWS
VMware on
AWS VMware on
Azure
VMware on
Azure Service
Level Agreement
Service
Level Agreement