Server
Colocation
Server
Colocation
 CDN
Network
CDN
Network
 Linux Cloud
Hosting
VMware Public
Cloud
Multi-Cloud
Hosting
Cloud
Server Hosting
Linux Cloud
Hosting
VMware Public
Cloud
Multi-Cloud
Hosting
Cloud
Server Hosting
 Kubernetes
 API Gateway
Editing DNS (Domain Name System) settings permit you to manage the relationship between your domain name and its associated server. This is critical for duties along with pointing your domain to a new net host, configuring email servers, or setting up 0.33-birthday celebration offerings. Below is a step with the aid of a step-by-step manual that will help you edit your DNS statistics.
a) Go to the internet site where your area is registered or your DNS settings are managed (e.g., Cyfuture.cloud).
b) Enter your login credentials to enter your account.
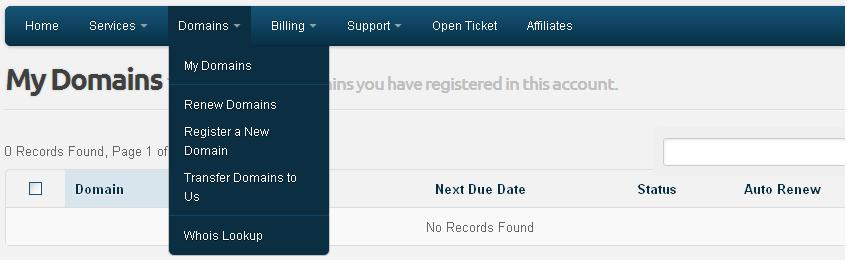
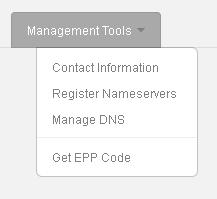
a) Once logged in, find the phase related to your domain's DNS settings. This could be labelled as DNS Management, Manage DNS, Zone Editor, or DNS Settings.
b) Select the area call for which you need to edit the DNS.
a) In the DNS control vicinity, you may see existing DNS facts together with A (Address), CNAME (Canonical Name), MX (Mail Exchange), and TXT facts. Each of those has a particular feature for the way your domain interacts with different offerings.
a) A Record: Points your domain to an IP deal (e.g., the IP cope with your internet website hosting server). To alternate, edit the IP deal underneath the "A" file.
b) CNAME Record: Used to factor a domain or subdomain to another domain (e.g., www on your primary domain). To edit, adjust the destination area underneath the CNAME file.
c) MX Record: Directs emails to your mail server. To edit, change the priority and destination mail server underneath the MX record.
d) TXT Record: Often used for domain verification or safety purposes (e.g., SPF, DKIM). You can upload or edit the values for these statistics as needed.
e) For every report, click Edit after the precise DNS access you desire to regulate. Update the fee fields as a consequence and save the modifications.
a) If needed, you can additionally upload new DNS statistics by way of choosing Add Record or Add New DNS Entry to your DNS supervisor. Specify the file type (A, CNAME, MX, and so forth.) and enter the required details.
a) After modifying the DNS statistics, click Save, Apply Changes, or Update DNS at the interface.
a) DNS changes may also take time to propagate across the internet, generally between 24 to 48 hours. However, in most cases, the changes will reflect within a few hours.
a) Backup DNS Records: Before making any changes, it’s a very good concept to take a screenshot or export the present-day DNS settings in case you need to revert them.
b) TTL (Time to Live): This placing controls how lengthy the DNS cache is saved. If you want the adjustments to take impact quickly, set the TTL to a low value, including 300 seconds (5 minutes).
By following those steps, you can easily edit and manage your domain’s DNS settings for the best functionality.

Let’s talk about the future, and make it happen!

 Pricing
Calculator
Pricing
Calculator
 Power
Power
 Utilities
 VMware
Private Cloud
VMware
Private Cloud VMware on
AWS
VMware on
AWS VMware on
Azure
VMware on
Azure Service
Level Agreement
Service
Level Agreement