Server
Colocation
Server
Colocation
 CDN
Network
CDN
Network
 Linux Cloud
Hosting
VMware Public
Cloud
Multi-Cloud
Hosting
Cloud
Server Hosting
Linux Cloud
Hosting
VMware Public
Cloud
Multi-Cloud
Hosting
Cloud
Server Hosting
 Kubernetes
 API Gateway
MX (Mail Exchanger) records play a crucial role in DNS settings, guiding your domain's emails to their destination. If MX Route is your choice for email services, tweaking your MX records could help with accurate email routing. With DirectAdmin, setting up a custom MX record template for MX Route is straightforward. This tutorial will help you with the process.
1. Navigate to your DirectAdmin login page.
2. Enter your username and password to access your control panel.
1. Once logged in, go to DNS Management for the domain you want to configure.
Click on DNS Management from the main dashboard, or navigate to Account Manager > DNS Management.
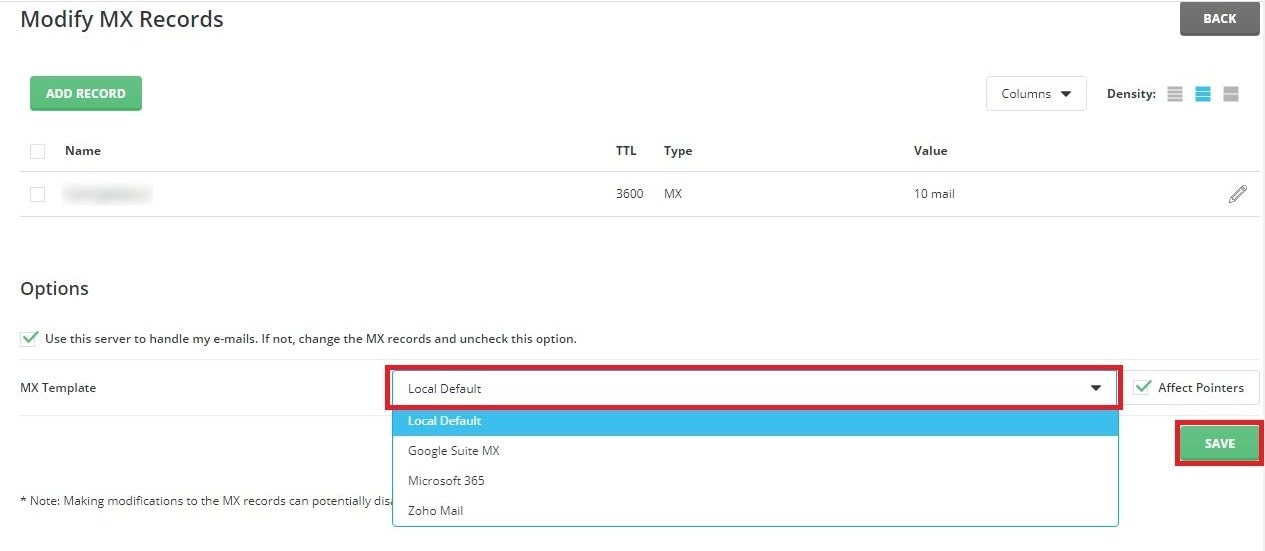
1. In the DNS Management section, look for existing MX records. These are typically labeled as MX.
2. To avoid conflicts, delete all existing MX records by clicking on the Delete button next to each one.
1. Scroll to the section labeled Add New Record.
2. In the dropdown menu, select MX Record.
3. Fill in the following details:
Domain: Leave this field blank to apply the record to the main domain, or specify a subdomain if needed.
Mail Server: Enter the mail server provided by MX Route. Typically, this would be something like mxroute.com.
Priority: Set the priority according to MX Route's recommendations. Lower numbers have higher priority (e.g., 10).
4. Click Add to save the new MX record.
SPF (Sender Policy Framework) records help prevent email spoofing. It’s recommended to add an SPF record if you’re using MX Route for sending emails.
1. In the Add New Record section, choose TXT from the dropdown.
2. Enter the following:
Domain: Leave this blank for the main domain.
TXT Record: Enter the SPF record provided by MX Route, such as:
3. Click Add to save the SPF record.
DKIM (DomainKeys Identified Mail) adds a digital signature to emails to improve email deliverability and security.
1. Still in DNS Management, choose TXT from the Add New Record dropdown.
2. Enter the following:
Domain: Use the selector provided by MX Route (e.g., default._domainkey).
TXT Record: Paste the DKIM key provided by MX Route.
3. Click Add to save the DKIM record.
1. Once you've input the required records, handy web resources like MXToolbox can help check if your MX, SPF, and DKIM records are set up right.
2. Allowing for DNS propagation is next. Expect it to take a handful of hours.
These simple steps guide you to craft a tailor-made MX record template for MX Route in DirectAdmin. Setting your MX records right is vital for the smooth delivery and routing of emails. Always double-check any alterations and refer to MX Route's guide for details based on your domain.

Let’s talk about the future, and make it happen!

 Pricing
Calculator
Pricing
Calculator
 Power
Power
 Utilities
 VMware
Private Cloud
VMware
Private Cloud VMware on
AWS
VMware on
AWS VMware on
Azure
VMware on
Azure Service
Level Agreement
Service
Level Agreement