Server
Colocation
Server
Colocation
 CDN
Network
CDN
Network
 Linux Cloud
Hosting
VMware Public
Cloud
Multi-Cloud
Hosting
Cloud
Server Hosting
Linux Cloud
Hosting
VMware Public
Cloud
Multi-Cloud
Hosting
Cloud
Server Hosting
 Kubernetes
 API Gateway
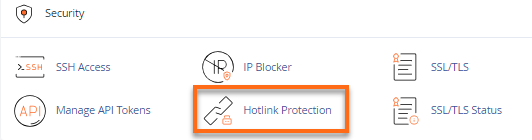
Hotlink protection stands out as an important security measure. Are you aware of this knowledge?
Well, we are here to help you!
In this detailed guide, we will discuss hotlink protection and its importance and provide a step-by-step explanation of how to enable it.
So, let’s get started!
In today's digital world, safeguarding your website's resources against illegal use is critical. This is why Hotlink comes into importance.
Hotlink security is an effective defense system against hotlinking, which may include unauthorized persons or websites directly linking to content housed on your server without authorization.
This can result in higher bandwidth demand, server strain, and possibly copyright infringement concerns.
Hotlink prevention seeks to prevent unwanted hotlinking while preserving your website's resources for legitimate usage.
Hotlinking, also known as inline linking or remote linking, is when a website or individual embeds material housed on your server. It may include such as photos, videos, CSS files, or scripts, onto their own web pages without permission.
Instead of hosting the information, they link directly to the resources on your site, effectively draining your bandwidth and system resources.
This not only threatens your website's security but also influences its performance and availability to legitimate visitors.
Hotlink protection plays a crucial role in maintaining the security of your website. Let’s scroll down to explore those several reasons:
#1 Bandwidth Conservation: Hotlink security helps preserve your server's bandwidth, ensuring that it is always available to legitimate website visitors. This can result in cost savings and better website performance.
#2 Resource Preservation: Hotlinking might strain your server's resources, resulting in slower load times and even outages. In addition, Hotlink protection helps safeguard your server's resources by avoiding excessive utilization caused by unlawful hotlinking.
#3 Securing Property: The content housed on your website is your intellectual property. This is why improper hotlinking is sometimes considered copyright infringement. Also, Hotlink protection helps to protect your intellectual property rights by prohibiting unauthorized usage of your material.
#4 Improving Website Performance: By minimizing the pressure on your server caused by hotlinking, hotlink prevention can boost your website's overall performance and speed for legitimate users. This results in a better user experience and more satisfaction among your target audience.
Enabling hotlink protection is a straightforward process. It involves configuring settings within your web hosting control panel.
Follow the step-by-step guide:
Log in to your web hosting control panel. It may be through cPanel, Plesk, or DirectAdmin. You can use the credentials provided by your hosting provider.
Navigate to the section of your control panel related to the website or security settings. Look for an option labeled "Hotlink Protection," "Hotlinking," or similar.
In the hotlink protection settings, you'll typically find an option to enable or disable hotlink protection for your website. Toggle the switch or checkbox to enable hotlink protection.
After enabling hotlink protection, you'll have the option to configure specific rules and exceptions based on your preferences. This includes defining which types of files are protected (e.g., images, videos), specifying allowed referrers (i.e., websites that are permitted to hotlink your content), and setting up custom error messages for unauthorized hotlink attempts.
Once you have customized the hotlink protection settings to your liking, make sure to save your modifications. It usually entails clicking a Save or Apply button on the control panel interface.
To check that hotlink prevention is operating properly, try to hotlink an image or file from another website. If done appropriately, the hotlink attempt should be prevented or diverted as per your preferences, and a custom error message may be shown.
You must frequently examine your website's hotlink protection logs and analytics to detect any unwanted hotlink attempts. Also, you may change your hotlink protection settings as needed to prevent new hotlinking sources. Plus, to enable genuine referrers that may have been accidentally blacklisted.
That’s It!
Hotlink prevention is an important security technique for maintaining your website. Follow our step-by-step guide instructions to successfully enable Hotlink.
Taking proactive efforts to preserve your website's resources ensures that your online presence performs optimally, reliably, and securely. Want more information? Get in touch today!

Let’s talk about the future, and make it happen!

 Pricing
Calculator
Pricing
Calculator
 Power
Power
 Utilities
 VMware
Private Cloud
VMware
Private Cloud VMware on
AWS
VMware on
AWS VMware on
Azure
VMware on
Azure Service
Level Agreement
Service
Level Agreement